Tuesday, June 7, 2011

iOS 5 Jailbroken Already

That was very fast. MuscleNerd, the brain of the iPhone Dev Team, today has posted on his Twitter account some screenshots and pictures of iOS 5 beta 1 already jailbroken. He confirmed that the jailbreak will work on iOS 5 final version but tethered jailbreak till now which means you'll have to connect your iOS device to your computer everytime you reboot it.


MuscleNerd has confirmed that Cydia works fine on jailbroken iPod touch 4G. The exploit used in this jailbreak is Geohot's Limera1n exploit which was released few months ago. You can take a look at our full coverage of iOS 5 features and availability.

(Via Twitter)
Read rest of entry

iOS 5 Features - Download - Release Time - Everything You Need To Know !

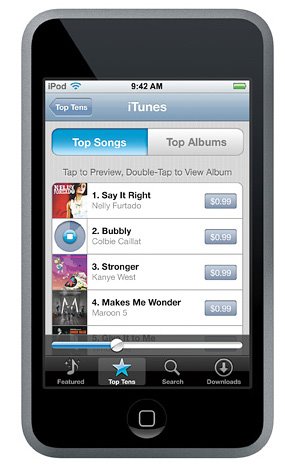
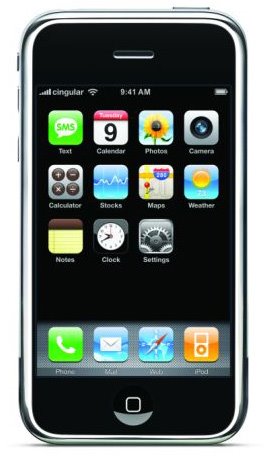
Starting with over 200 million iOS devices and that makes iOS the #1 mobile operating system. With more than 44% of the market... They sold 25 million iPads in 14 months. Over 130 million books downloaded. 90,000 apps made specifically for the iPad. Apple has paid out more than 2.5 billion to devs. Now lets talk about the future of iOS: iOS 5.

Features

Notifications:
They've built something better than you expected for notifications. They've built something called Notification center. It's a single place combining all your notifications. Just swipe your finger from the down up to reveal the notification center. It shows you everything, Facebook notifications, Twitter and everything you need. When you get a text message, you get a nice notification at the top there. You can dismiss it, or tap there and you can always go back later.


Newsstand:
It's all about reading news and magazines. They've added subscription lately. Some incredible titles are doing it, like national geographic. They created a single place in the app store that combines them all at one place, purchase them, and they're automaticly downloaded right on the home screen


Twitter:
They've made it more and more easier. You go to settings app, and you can just enter your credentials and all your apps will already be logged into your twitter. They added twitter to many of our apps. Like Cameras, photos. There is a new option to share: Tweet and it opens a nice sheet. YOu can get a countdown and even optionally add your location. It's that simple. In addition, you can tweet articles from safari, websites. VIdeos from youtube, and even apps


Safari:
iOS 5 is making safari even better. The first is reader. It's available up here as abutton. When you read a story, you tap that button and we extract all the info. Even if it's a multi page story. WE put it in a single scrolling story. Really convenient. Second one is reading list. It's a simple convenient way for you to save a story to roead it later. When you add something, it will add it to reading list on every iDevice. Even on the mac or Windows. When you email now too, you can have the content in the content window. It works great on iPad and iPhone. Really nice.

Tab Browsing:
This features enables you to jump on the mac or any other iOS device easily.

The Reminder Up:
It's a new revemaped system of the reminder. That's it.

Camera:
First, it's gonna be way faster to get in and take a photo. Just hit the new iCon, and you're right there. Even if you have a passcode and you can hit the camera from the lockscreen. You can also take picture with the volume up button (remember Camera +?) You can now pinch to zoom within the camera. If you hold your camera you can lock exposure. This is a really advanced feature, and we brought it tothe iPhone. ONce that you take these photos, you can edit them right in your iPhoen or iPad. Rotate, red eye reduction.

undefined

Mail:
Mail is one of the most used applications on iOS. We're making it even better. Rich text formating, bold, underline. You can control indentation. Drag the address across fields. Also: search the entire content of your emssage on your phone and the server. It's really nice to use this. You can swipe and so on. Also, we added more support for entreprise customers. This time we're adding X-Mime. you can use certificates, and get that locked iCon that says your mail is encrypted.


New Keyboard to iPad:
Since the revolution iPhone, we revollutionzed the keyboard. They're making it even better. For those who like to type with thumbs. It's a split keyboard that moves around with your thumbs

PC-Free:
You can now setup and activate device right on the go without need to PC, yes without PC. Now you can add and delete calendars right from iOS. And surprisingly they're letting people update over-the-air.


Game Center:
You can fight for achievement points. Compare with friends, have recommended friends.

iMessage:
They're launching a new messaging system for all customers. It supports iPad, iPod and iPhone. It does everything plus it adds some new features as delivery receipts. You can always enter and go out, the content of the conversation is saved. It works 3G and Wifi. All encrypted. It allows you to send and receive messages while you're playing games.

Availability

iOS 5 will ship to all of our customers this fall. iOS 5 will be available to developers tonight. We'll of course upload the betas of iOS 5 on our servers to let our users have fun with it before it's being released. Please follow us !
Read rest of entry

Friday, May 27, 2011

Make Your Own iPhone App, No Programming Necessary

Do you really want to make your own App? Is it difficult to make an iPhone app because of coding? May be you don't have a MacBook? Well, let me tell you that starting from today you can make your own iPhone app using a new service called AppMakr. Yes, no coding required. No programming necessary and it's just too easy.


AppMakr allows you to upload your own iPhone app and its icons, or you can choose from their selections but I don't recommend that.. You'll see. You’re also given the chance to upload your own splash screen and other images for the software.

You’ll need a $99 Apple developer account to build the app to your device and submit it to the App Store. If you’re worried about the money, just let AppMakr help you insert ads into your application, and you’ll make that hundred bucks back in no time.

Well, try it and let us know in the comment section below.
Read rest of entry

Taking better HDR photos with your iPhone 4

Curious about how to take better HDR (high dynamic range) photos with youriPhone 4? Maybe you’ve tried it out but the end result wasn’t as good as you were expecting? Apple makes it pretty easy to take HDR photos, but for some pointers on how to take the best HDR photos possible just follow along after the break!


undefined

When Apple introduced iOS 4.1 they included HDR capability for the iPhone 4. This rather basic form of HDR works by combining 3 photos (under-exposed, normally-exposed, and over-exposed) for better overall detail and quality. So instead of the sky looking washed-out or shadows an inky mess, you’re left with a better balanced photo that shows more in both areas.

How to enable HDR

First thing’s first — HDR is turned off by default, so you’ll have to turn it on before getting started. It’s as simple as tapping the ‘HDR’ option at the top of the viewfinder in the Camera app.
undefined

Better safe than sorry

You also have HDR options from within the Settings app, which let you change whether iOS will keep the original, non-HDR photo as well. Sometimes HDR compositions don’t match up exactly and you get a bad picture. Keeping the original gives you a back up if it’s something important you just can’t take again.
  1. Launch Settings
  2. Scroll down and tap Photos
  3. Toggle ‘Keep Normal Photo’.
Now, on to the good stuff…

1. Keep it steady

When using HDR you’ll want to make sure to keep your hand as steady as possible, otherwise your photo will look a little blurry or not properly aligned like mentioned above. Remember, when the iPhone snaps an HDR photo, it’s actually taking 3 separate pictures and combining them together, but it doesn’t take all 3 photos instantly. That means if your hand moves while it’s capturing the pictures you’re going to end up with a photo that Mr. Blurrycam would be proud of.
It’s best to use a tripod if you can, but in those cases where using a tripod isn’t an option, do everything you can to keep a steady hand for better results. Leaning up against a wall (if possible), or resting on a table or ledge, is a great way to help keep your hand still when taking HDR photos.
Bonus Tip: Another handy tip sent in from a reader is holding down the camera shutter button and releasing it when the moment is right, instead of tapping it when you’re ready take the photo. When you tap the shutter button, you might be slightly nudging the iPhone which can affect the blur level in HDR photos. By tapping and holding the shutter button and then releasing when you’re ready to capture the photo you can dramatically lower movement, thus helping to avoid blur. (thanks parabel!)

2. Focus on your subject

undefined
If you’re shooting a specific subject in HDR, make sure your subject is properly focused before snapping the photo. When iOS combines the three images to make it an HDR photo, it has a more difficult time processing and combining the all the pictures to create a good looking HDR photo if the focus is off, so keeping your subject in focus is a great way to get better results.
Just tap on the person or object you want to be in focus. A white square will appear and the iPhone 4 camera will focus accordingly.

3. Keep movement to a minimum

Your photos might not look very good if you have moving subjects within your shot. For example, if you’re taking a picture of a busy intersection like the photo above (thanks, Sion!), you’re not going to get the best results because people and cars moving around in the shot aren’t going to be captured at the exact same time across all three images.
This rule of thumb is especially true when working with HDR photos. When the iPhone does its job and combines the images into a single HDR, just like if your hands shake, the photo with moving subjects involved will likely blur or suffer from ghosting. Any movement within the shot should be avoided whenever possible.
Note: This can also result in artistic and unique HDR photos, so if that’s you’re intent, don’t be afraid to play around a bit.

4. There’s an app for that

Although the native HDR feature on the iPhone is pretty great, it’s also somewhat limited when it comes to flexibility and customizing your settings. If you want more control over HDR photos, here are a couple of great HDR alternatives you can find in the App Store:
  • Pro HDR ($1.99 – iTunes link) Pro HDR is an awesome alternative that lets you really drill down in terms of customizing your HDR photos. You can modify the exposure levels for each shot before combining them into an HDR photo, which is great for specific conditions where you need the added modifiability. It also has a proprietary image alignment algorithm that precisely aligns full-size images in seconds, and the app is very speedy in general when handling HDR shots.
  • TrueHDR ($0.99 – iTunes link) TrueHDR is another great HDR app to take a look at. It has a lot of nice features and gives you a choice of ‘Natural’ or ‘Enhanced’ modes, with Natural for the most realistic look and Enhanced for slightly more vivid colors and contrast – pick the look you like! It also makes it easier to capture moments with an AutoCapture mode and gives you better control over exposure points.
So go out and put your new-found knowledge of HDR picture taking into practice and let us know how it goes for you! Have any additional HDR pointers or tips we left out? Also let us know of any other great HDR apps, tips or suggestions you have in the comments!
Bonus Tip: If you’re jailbroken, here’s how to enable HDR on your iPhone 3G or 3GS. The process isn’t for beginners, and requires you to SSH into your iPhone to modify a plist file, but the end result is not having to upgrade to an iPhone 4 just to get into the HDR game.
Tips of the day will range from beginner-level 101 to advanced-level ninjary. If you already know this tip, keep the link handy as a quick way to help a friend. If you have a tip of your own you’d like to suggest, add them to the comments or send them in to news@tipb.com. (If it’s especially awesome and previously unknown to us, we’ll even give ya a reward…)
Read rest of entry

Monday, May 16, 2011

71 Awesome Apple iPad Wallpapers


The iPad is a tablet computer developed by Apple Inc. Announced on January 27, 2010, it is similar in functionality to the iPhone and iPod touch, running the same operating system (iPhone OS) and almost all of the same applications.. Apple Ipad is the Hot Topic these days, and so here we are posting some of the best Apple iPad Wallpapers. All these Wallpapers are free to download. So we present to you a new and diverse collection of 71 free Apple iPad wallpapers.

Download The 71 Apple Ipad Wallpapers Set Here

Read rest of entry

HOW TO:Use Bootlance To Install Android 2.2.1 Froyo On iPhone 3G / 2G [No Computer Required]


no wires, nothing… Now you can do that, thanks to Bootlace 2.1.
Supported Devices/iOS versions (Not including GM seeds)
android apple HOW TO: Use Bootlance To Install Android OS On Your iPhone 2G/3G Without The Need Of A Computer
iPhone 2G:
  • 3.1.2
  • 3.1.3
iPhone 3G:
  • 3.1.2
  • 3.1.3
  • 4.0
  • 4.0.1
  • 4.0.2
  • 4.1
Jailbreaks
  • PwnageTool
  • Redsn0w ( not 0.9.6b2 for now )
  • Blackra1n
NOTE: IF YOUR DEVICE/IOS VERSION/JAILBREAK IS NOT LISTED, THEN IT IS NOT SUPPORTED.
HowTo:
1. First you will need to add this repo: http://repo.neonkoala.co.uk ( package will most probably be available on default repos soon ), and install Bootlace
IMG 0003 266x400 HOW TO: Use Bootlance To Install Android OS On Your iPhone 2G/3G Without The Need Of A Computer IMG 0004 266x400 HOW TO: Use Bootlance To Install Android OS On Your iPhone 2G/3G Without The Need Of A Computer
2. A new icon will be added to your SpringBoard called ‘Bootlace’
IMG 0006 266x400 HOW TO: Use Bootlance To Install Android OS On Your iPhone 2G/3G Without The Need Of A Computer
3. Load Bootlace and install ‘OpeniBoot’.
bootlace HOW TO: Use Bootlance To Install Android OS On Your iPhone 2G/3G Without The Need Of A Computer
4. Now, tap on ‘iDroid’ and install it.
IMG 0011 266x400 HOW TO: Use Bootlance To Install Android OS On Your iPhone 2G/3G Without The Need Of A Computer IMG 0012 266x400 HOW TO: Use Bootlance To Install Android OS On Your iPhone 2G/3G Without The Need Of A Computer
5. Once you installed iDroid, that’s it, you are done. You now have a dual-boot iPhone. To boot into Android OS, you can reboot your iPhone or from inside Bootlance, tap on ‘QuickBoot’ and then tap on the Android icon.
IMG 0014 266x400 HOW TO: Use Bootlance To Install Android OS On Your iPhone 2G/3G Without The Need Of A Computer IMG 0013 266x400 HOW TO: Use Bootlance To Install Android OS On Your iPhone 2G/3G Without The Need Of A Computer
NOTE: if any updates to the iDroid project will be released, all you have to do is load Bootlace, tap on iDroid and update. Simple as that…

Read rest of entry

Saturday, May 14, 2011

iOS freebie: Super-8, a vintage camera from Paramount Digital Entertainment


undefinedundefined


You can “change” the camera lens to enable a range of different effects, such as color, chromatic, black & white, sepia, x-ray, negative and infrared. The app also lets you turn on the frame shake effect, apply scratch-and-dirt overlay to your footage and arrange the clips – even add an authentic super 8 film leader and your own credits and film title. When done, view finished movies in the built-in Super 8 projector room, export them to a computer via iTunes file sharing or email them to friends.
Read rest of entry
 

My Blog List

Followers

Recommended Gadget

  • ads
  • ads
  • ads
  • ads

Tech. Muse Magazine Copyright © 2009 Gadget Blog is Designed by Ipietoon Sponsored by Online Business Journal